-
Want to pull colors from an image?
One of the fun things I love about designing is being able to play around with all the colors you can imagine. Do you know how many shades of pink there are or how many shades of red… I don’t. But in Photoshop I have a way to find shades that I never would have known about. With their ‘Indexed Color’ feature it allows me to pull even the subtle shades that I see with my eye but can’t tell the difference between two of the colors when I look at it. Let me show you what I mean. For this tutorial we will use a photo that I took…
-
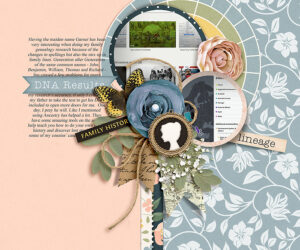
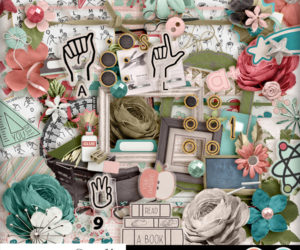
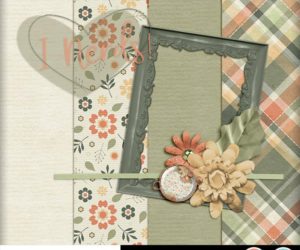
Renew And Repurpose Digital Elements
I love fun and creative tutorials. This tutorial by Rae Clavett over at The Digital Press creative team, ‘Renew and Repurpose Digital Elements’ is the perfect tutorial to share with you at the start of 2016. I know the reason I love digital scrapbooking is because I can reuse all the items I buy over and over again unlike traditional scrapbooking where items are no longer in print and all I have is what I have in my stockpile (hence why I hoard my supplies.. hehe.) In this tutorial Rae shows you ways that she was able to renew and repurpose digital elements which I thought were very creative and easy to do.…
-
Do you have a photo that you would like to bring new life to?
Let me help you. Red Eye and Blemish Correction Eyeglass and Flash Glare Minor Background restoration Minor Scratches and blemishes Minor to moderate color adjustments Damage to edging or background On average, these types of restorations are around $20 -$30 and may take up to three (3) days. Cheaper than many others who want charge up to $75 an hour. My goal is to provide you with quality work without breaking your bank! https://www.etsy.com/listing/204530613/photo-restoration?ref=shop_home_active_1 [Best_Wordpress_Gallery id=”4″ gal_title=”Photo Touch-ups”]
-
Funday Monday – Tutorial – Splicing a Signature
Have you ever wondered how you make your forum signature linked to your blog, Pinterest or Facebook? As Designers, having our signatures linked to our stores are great, but sometimes it’s hard to get everything lined up so you can get everything nice and neat. I have tried many tutorials on how to do this, but always had some issues. Well, that all changed today when I found a tutorial on how to use the ‘Splice Tool’ in Photoshop. Now the site I found was kind of confusing http://www.ehow.com/how_5883239_slice-photoshop.html – so let me show you how I did it. Step 1: Open your signature file and click on the arrow…
-
Paper Clip Tutorial
Today’s tutorial will show you how to make a realistic paper clip from the paper clip shape in Photoshop. The tutorial is by Rhoda at Digidesignresort. Get the tutorial by clicking the paper clip below. Have a great week, and Happy Scrapping!
-
Funday Tutorial
It is always fun to find a new way to change up your designs, and give your layouts that special ‘pop’. When scrapbooking pages of your kids it would be nice to make it look like a crayon drawing with crayon lettering. Once you download this tutorial you will be able to give your pages that look. I found this tutorial at Digidesignresort. I put a direct link to this tutorial inside the instructions. Just click on the image below to download the tutorial. Have a great week, and Happy Scrapping!
-
Styles Tutorial
Please forgive me for missing last “Funday”. Between having a bad health week and both my PC and MAC giving me problems, I did not get much done. Maybe my computers had the same virus as me! Anyways, it is good to be back. I received this tutorial from Digital Scrapbooking Studio’s newsletter, and I want to share it with you. This will come in handy if you like to use styles. There is a free template to go with this tutorial that you can get by clicking on “SnickerdoodleDesigns” below and then scrolling to the end of the page, and there is a nice tip at the end of…